Easy Homemade Pesto

I came to the Pesto Party a bit late in life (I’m a peculiar sort of person who doesn’t eat pasta) but it’s the ultimate accompaniment to any summer meal. It works with meat, fish, potatoes and even cheese on toast (try it!)

It turns out it’s also incredibly easy to make. There are two methods you can use – the blender or the pestle and mortar. The blender is by far the easiest to use and will create the kind of pesto you are used to picking up in the supermarket. The pestle and mortar is the more traditional method and creates a chunkier pesto with stronger flavours.

For either method you should adjust the quantities below according to your taste preference:

2 Packs of Fresh Basil (or 2 bunches)

30g Pine Nuts

4 Cloves Garlic

7 Tsp of Grated Parmesan

Pinch of Salt & Pepper

Drizzle of Olive Oil

I’ll start with the blender method as it’s the easiest:

  1. Blend the basil until it’s finely chopped
  2. Next add the pine nuts and blend until they are coarsely chopped
  3. Add the garlic (whole cloves) and blend again
  4. Add in the seasoning and olive oil and mix to combine
  5. Stir in the parmesan

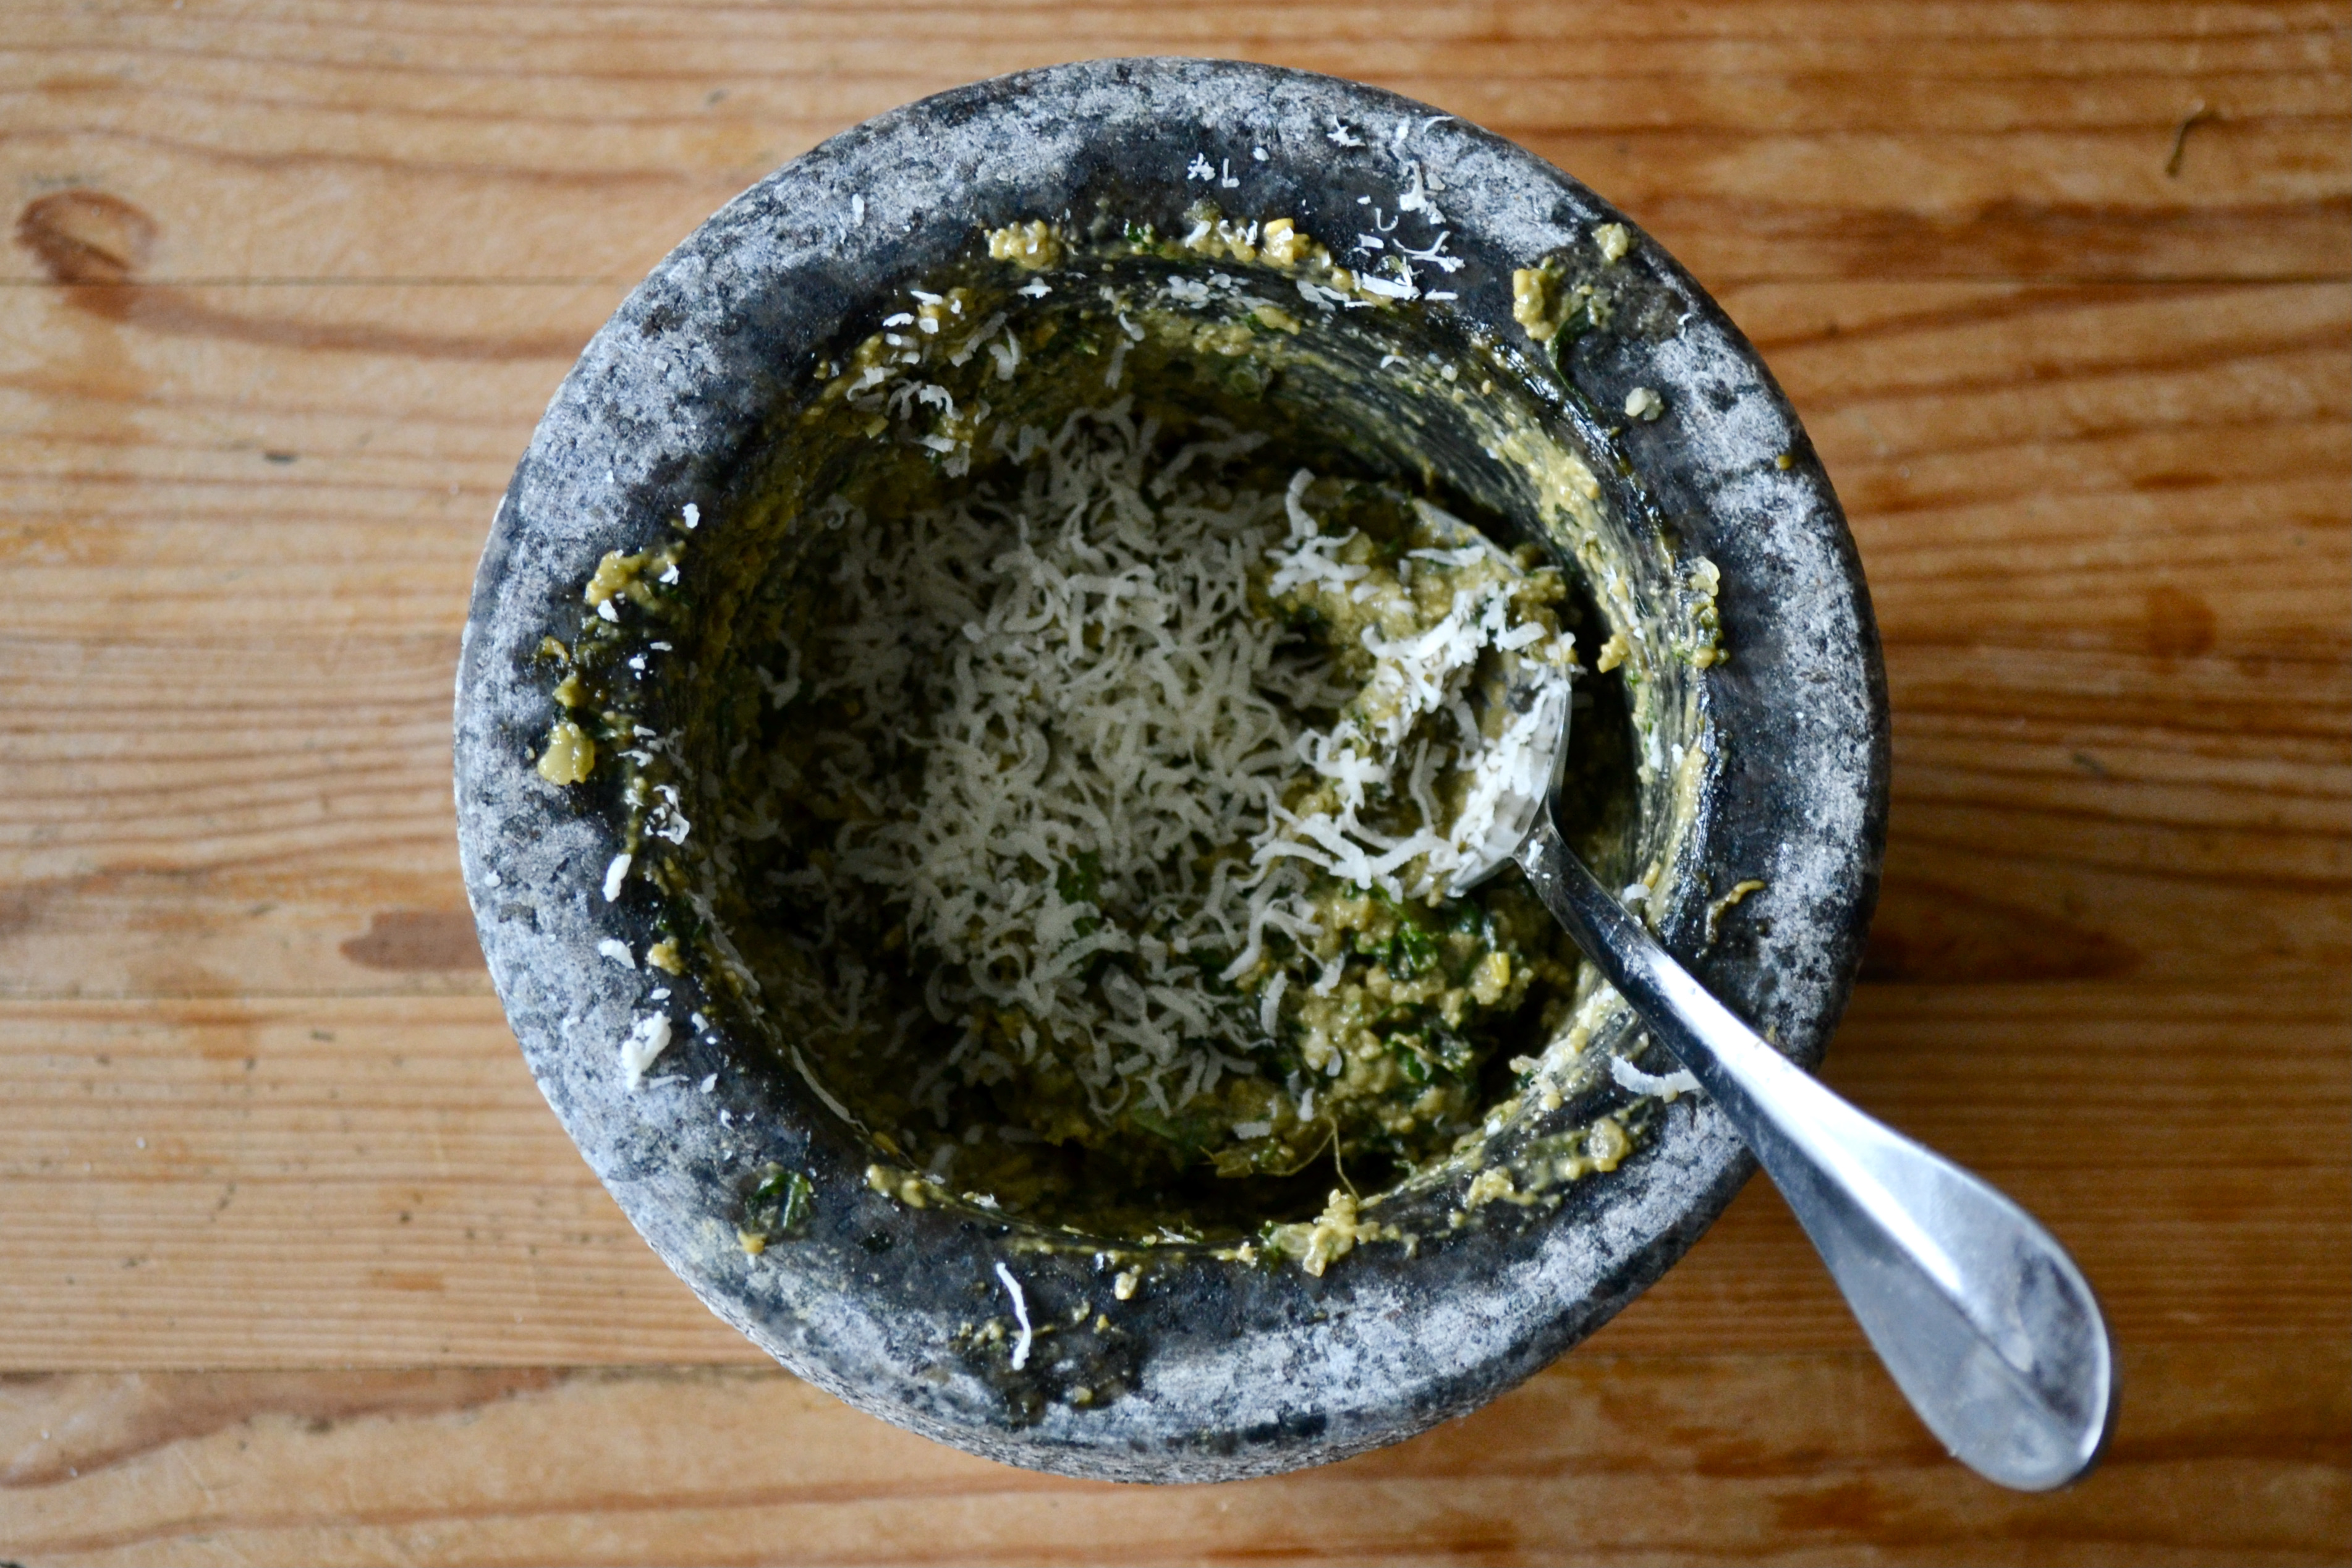
If you’re using a Pestle and Mortar, it takes a little bit more work:

  1. Grind the Pine Nuts until they reach a paste-like consistency
  2. Next add the garlic. You can do this as a whole clove (skin off) or to speed things up, use a garlic press.
  3. Add the Basil in small batches and grind
  4. Sprinkling Salt in between the batches will help the basil to break down more easily, but be careful not to over-salt.
  5. Stir in the remainder of the Seasoning and the Parmesan
  6. Stir in the Olive Oil

For both methods, remember to taste the mixture once all of the ingredients have been added – if it’s too nutty, add more basil, if it’s too peppery add more cheese.

Finally, if you aren’t using the pesto immediately, transfer it to a jar, tap it down and cover the top with a generous layer of olive oil. This will help preserve it and should mean it lasts for a few weeks in the fridge.

Pot Au Chocolat

This is a super simple recipe for little chocolate pots that will rival anything you can buy on the desert aisle in the supermarket.

It’s no-bake, no-hassle and uses only 4 ingredients.

Make 8 when using ordinary sized ramekins as pictured.

1 standard pack of Oreos (154g)
Unsalted Butter (50g)
2 packs of Dark Chocolate (300g)
1 tub of double (heavy) cream (300ml)

Step 1) Blitz the Oreos in a blender.

Step 2) Melt/soften the Butter and add this to the Oreo-mix in the blender. Blitz again.

Step 3) Using a teaspoon, line the bottom of your pots with the Oreo mixture (approx 4 teaspoons worth) and compress it.

Step 4) Warm the cream in a saucepan until it just bubbles.

Step 5) Break up the chocolate and put in a heat-proof jug. Pour the cream over the chocolate and allow to sit for 30 seconds.

You’ll need to work quickly for this next bit…

Step 6) Stir the chocolate/cream mixture until all the pieces have disolved.

Step 7) Once you have a smooth creamy mix it will begin setting so quickly pour it into each of the pots – distributing evenly so that you have at least the same amount of cream as biscuit base.

Step 8) Smooth out the surface then leave to set in the fridge for at least 2 hours.

If you prefer a softer, less rich mixture add more cream in or decrease the amount of chocolate. Alternatively, leave the deserts to stand for 5-10 minutes at room-temperature before serving and the ‘set’ will loosed up slightly.

Easter Nests with a Twist

It’s finally here. The weekend chocaholics dream off all year… Well, since Christmas anyway!

I’m talking of course about Easter. Ever since I was little I’ve made Easter nests. They’re one of the first things you learn how to make in school, and a super fun activity for kids (my favourite bit was licking the bowl!)

For those who haven’t made them before, simply melt chocolate, stir in cornflakes, put into paper cases and leave to set in the fridge. Yum.

But now that I’m a “grown up” I’ve started experimenting a bit… and today I’m sharing some twists on an Easter classic.

Change up your Chocolate
Easter nests are traditionally a milk chocolate affair, but as we all know Dark Chocolate is healthier so why not change it up a bit? Or melt two batches and go half and half – the best of both worlds!

Get Fruity
I love Chocolate Raisins – they’re my snack of choice on road trips. Try mizing them in with your cornflakes, the mixture of textures is great too.

Another combination I like is Chocolate and Orange. After you’ve melted the chocolate, grate in some orange zest and stir in before coating the cornflakes. You could even try grating ginger in for a bit of spice.

Go Nuts
I always finished the nests off with Cadbury’s Mini Eggs but chocolate and yoghurt coated nuts would make a great addition.

Dark Chocolate Chip Banana Bread

As I’ve mentioned before, we have a penchant in our family for handmade gifts (as demonstrated here). So with Mother’s Day coming up this Sunday in the UK I’ve been mulling over what to make. I thought this recipe I came up with for Dark Chocolate Chip Banana Bread would be perfect, after all my mum is forever telling me I need to eat more fruit and veg… Unfortunately my mum has decided to give up chocolate for lent so it’s back to the drawing board for me but I hope you all get chance to try this delicious recipe for yourselves. If any one asks, it’s one of your 5 a day!

DSC_0120

Recipe:

200g (1 cup) Golden Caster Sugar
120g (1/2 cup) Soft Margarine for baking
250g (2 cups) Self Raising Flour
2 Eggs
1/2 tsp Baking Powder
1/2 tsp Salt
3 Bananas
200g (1 cup) Chocolate Chips

1) Preheat the oven to 180°C
2) Grease and line a loaf tin
3) First, cream together the sugar and margarine (can be done with an electric beater). If you don’t have margarine you can use softened unsalted butter, but I’ve found it makes the mixture heavier.
4) Beat the eggs and add them to the mixture, then fold in the flour, baking powder and salt. (Plain flour can be used but you will need to add an extra tsp of baking powder to help it rise as this is quite a heavy mixture.)
5) Mash the bananas then add them to the mixture.
6) Finally, stir in the chocolate chips (I tend to use a mixture of Milk and Dark)
7) Fill the tin by 3/4 and bake for 45 minutes until a skewer comes out clean.

This mixture is also great for cupcakes/muffins – just reduce the baking time to 20 minutes.

DSC_0084

DSC_0097

DSC_0106

DSC_0116

Stir-Up Sunday: Christmas Cake

Technically, Stir-Up Sunday was last weekend – the 24th November – but as my laptop has gone to the great scrapyard in the sky *sob* this is the first chance I’ve had to borrow one and start posting again…

For those of you who haven’t heard of ‘Stir Up Sunday’ before, it’s an old English tradition (and one we follow religiously in our family.) It basically refers to the Sunday that falls a month before Christmas. The idea is that you put aside this day to complete all your pre-Christmas baking – thereby allowing a month for your cake and puddings to ‘mature’. On this day everyone who’s present can ‘stir’ the mixture and make a wish…

This year will be the first time the responsibility of the cake has fallen to me, and sticking with tradition, I’m following our family recipe…

DSC_0876

Tools of the trade:
Mixing Bowl (x2)
Cake Tin (20.5cm Square – though anything about that size will do)

Baking Parchment
Wooden spoon/spatula
Ingredients:
400g Plain Flour
1tsp of Ground Cinammon
1tsp of Ground Mixed Spice
Rind of 1 Lemon (grated)
350g of Unsalted Butter
350g of Caster Sugar
6 Eggs (beaten)
500g Currants
350g Sultanas
225g Raisins
100g Flaked Almonds
3/4 of a tub of Mixed Peel
1 tub of Glacé Cherries
2 table spoons of brandy (and more once cooked)

To decorate:
Ready-to-roll Marzipan
Ready-to-roll Icing

DSC_0882

First… grease and line your tin.

Then sieve the flour and spices over a mixing bowl. Ordinarily I’m not one to faff with sieving anything, but there are no raising agents in this cake so it’s important to get air in where you can and keep the mixture as light as possible.

DSC_0883

Next, grate the lemon rind over your mixture, taking care not to get any of the pith.

Then, in a separate bowl (or if you’re lazy like me, a food processor) cream the sugar and butter together.

DSC_0884

Add the beaten eggs to the sugar and butter, a little at a time. If it starts to look like its curdling, adding some of the flour/spice mixture early will help to stop this.

Once all the eggs have been added, gently fold in the flour mixture.

DSC_0888

Then begin to add the dry fruits, starting with the currants and working your way down the list. Again gently fold them in to avoid knocking out the little air there is.

DSC_0892

Finally, add the brandy.

Your cake mixture is now ready to be baked. Put it into the tin but hollow out the centre of the mix so that it will be level when it rises (rather than domed)

Bake for 3.5hrs at 140 degrees Celsius. When it starts to brown, cover in foil so the top doesn’t burn.

After this time take it out of the oven and allow it to cool for 1 hour in the tin before turning out onto a wire rack.

Prick the cake all over with a skewer and spoon brandy over the cake (I’m quite liberal with this as I think it makes for a moister cake).

And now the hard part… DO NOT EAT the cake. Instead, wrap it in baking parchment and leave to mature in a cool, dry cupboard for 1 month (if you like your cake softer/quite boozy you can always feed it with more brandy as time goes on.)

Then, on Christmas Eve, bring your cake out of storage and decorate. Just in time for the big day!